Embroidery patches are a creative and fun way to personalize your T-shirts, bags and jackets. But what if you want to transfer the patch to another item or just remove the patch from the current item as you want to add a new patch to your items.
Is it difficult? Can you do it without harming, or damaging your item? Yes! You can, with the right patch removal technique you can remove an embroidered patch easily. Just read this blog till the end!
Types of Embroidered Patches Backing
Typically embroidered patches come in two different backing options, one is iron on backing and other is sewn on backing. Let’s delve deeper into them one-by-one.
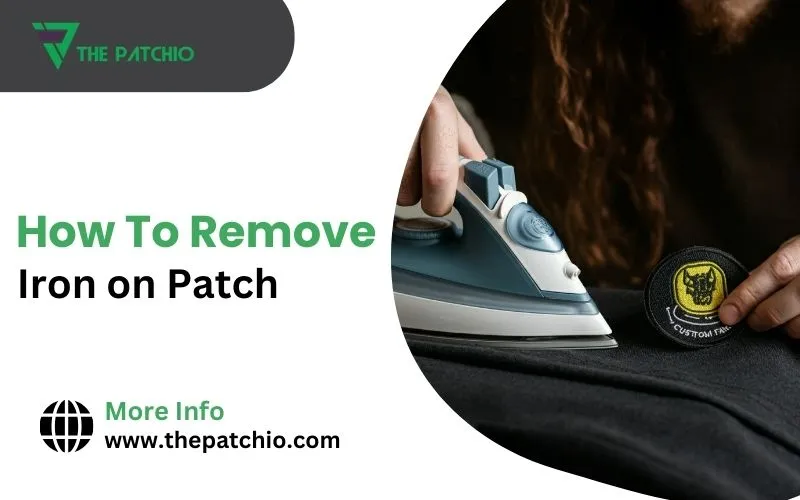
Removing an Embroidered Patch with Iron-on Backing
Before you start to remove your embroidered patches with iron-on backing, there are few items that you need to gather first, mentioned below:
- Tweezers
- Rag
- An iron
- Ironing board
- Wax paper
- A thin piece of cloth
- Scissors
- Liquid adhesive remover
Removing an Embroidery Patch with the Iron Method
Set Up Your Workspace
Gather an iron board to ensure a flat surface and place a towel or a piece of thick cloth to protect the surface from being damaged from the iron’s heat.
If you don’t have an iron board, then no worries! Look for a flat surface like a table, etc and follow the same process as mentioned above.
Position Your Fabric
Once you are done setting up your workspace, lay down the fabric on your iron board or flat surface, clear any wrinkles or creases on the fabric to ensure the fabric remains smooth while the patch removal process.
Check Fabric Heat Resistance
Once you have laid down the fabric and ensured a smooth surface, first check the heat resistance of the fabric. Firstly, identify the hidden part of the fabric, after identifying, place a thin piece of cloth or wax paper and apply the iron (after setting it to appropriate heat setting according to your fabric type).
Apply the iron for 15 seconds, then remove your patch or thin piece of cloth to see any signs of damage to your fabric. If you see any signs of damage then, the iron method is not ideal for fabric and you should move forward with the adhesive removal method.
Apply Heat to the Patch
Once you have ensured that your fabric is not being damaged and resistant to iron’s heat. Apply the iron to the hidden part of the fabric, for at least 15 seconds to soften the adhesive that holds the patch onto its place.
Check if the Adhesive Softens
After applying the heat, check whether the patch has started to loosen or not. If the patch has not softened yet, re-apply the iron heat for 15 more seconds or more until it starts to loosen up.
Lift the Patch
When the adhesive on the patch starts to loosen up, gather the pair of tweezers, and start grabbing the edge of the patch. In an upward motion start removing the patch from the fabric. If you feel any force of resistance, then you may need to apply more heat to soften it.
Remove Residue
Once you have successfully removed the patch from the fabric, you will get some remaining residue that you will have to remove. Apply the adhesive remover and with the help of the cleaning rag, start rubbing it on the fabric, gently.
If the residue is too thick and sticky then use the help of a toothbrush and scrub the area. Remember, to follow the instructions on the adhesive remover before applying it onto the fabric.
Wash the Fabric
Once you have removed the remaining residue with the help of an adhesive remover. It’s time to give it a wash and ensure the fabric is completely fresh. Apply a liquid detergent into your washing machine and run your fabric through a washing cycle.
After washing the fabric see whether the residue is completely removed or not, before putting it in the dryer. If the residue is not completely removed then repeat the washing cycle until the residue is completely removed and then put it into the dryer.
Removing an Embroidery Patch with Adhesive Remover
Testing the Adhesive Remover
For the adhesive removal method, all you need is an adhesive remover. Firstly, test it on your fabric, at the backside of the patch and see how the fabric reacts to the adhesive. Observe, whether it is getting any sign of damage or not.
Applying the Remover
Once you successfully tested the remover, spray or apply it properly on the backside part of the fabric on the patch.
Allowing to Soak
Use a cleaning rag to gently rub the adhesive remover for at least one minute on the backside of the patch.
Peeling Off the Patch
After the proper application of the adhesive remover, carefully start removing the patch from the fabric.
Cleaning Residue
Once you have successfully removed the patch from the fabric, remove the remaining residue with the help of the cleaning rag, and there you have it, your patch is successfully removed.
Need More Information?
Request a quote. We will get back to you within 8-12 hours with a custom product quote.
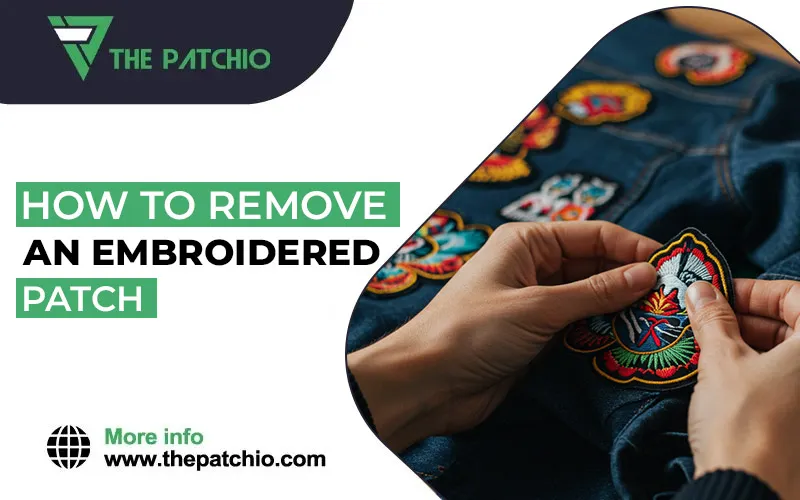
Removing an Embroidery Patch with Sew-on Backing
Sew-on patches are attached with stitches rather than adhesive, making removal straightforward. Here’s how you can remove them efficiently:
Items You Need:- Seam ripper or small scissors
- Tweezers
- Thread remover (optional)
- Lint roller (optional)
Steps to Remove a Sew-on Patch
1. Turn the Fabric Inside Out
Begin by carefully flipping the fabric inside out. This action will expose the stitches that hold the patch in place, making it significantly easier to see and access each individual stitch for removal.
2. Use a Seam Ripper
Grab a seam ripper, which is a small, pointed tool designed specifically for this task. Gently slide the pointed end of the seam ripper under the first stitch, being mindful not to damage the surrounding fabric.
Cut the stitches one by one, taking your time to ensure you don’t accidentally slice through the fabric itself. If you don’t have a seam ripper on hand, you can substitute it with small, sharp scissors that can fit between the threads.
4. Remove Loose Threads
Once the patch is fully separated, take a moment to inspect the area for any loose threads that may have been left behind. Use a pair of tweezers to meticulously pull out any stray threads, ensuring that the fabric looks neat and clean.
5. Clean the Area
To finish, it’s important to clean up any remnants of the removal process. Use a lint roller to go over the affected area, which will help pick up any thread fragments or fluff that may have accumulated.
After lint rolling, consider washing the fabric according to its care instructions to refresh its appearance and remove any remaining bits of adhesive or thread.
Conclusion
Now that your old embroidered patches are off, it's the perfect opportunity to refresh your jacket, bag, or t-shirt with brand-new custom patches. At The Patchio, we create high-quality custom PVC patches, iron-on patches, and more in any shape or size you need. Just share your design, material preference, and quantity, and we’ll provide you with a free quote!
We proudly serve teams, businesses, and individuals looking for durable and eye-catching patches. Plus, with fast turnaround times and free U.S. shipping, getting custom patches has never been easier. Contact us today to bring your design to life!