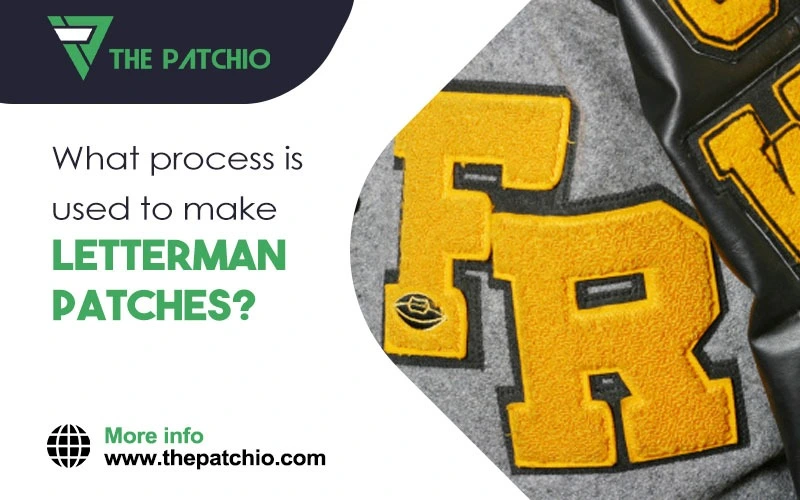
Letterman patches are special in academic and athletic achievement, symbolizing dedication, hard work, and success. Originating from American high schools and colleges, these iconic emblems are more than just decorative elements on a letterman jacket; they represent personal milestones and accomplishments.
Crafting these patches involves a meticulous process that combines creativity with technical skill, allowing individuals to create a unique representation of their achievements.
This guide will explore the art and process of making Letterman patches, from traditional chenille designs to custom creations that showcase your individuality. Whether you're a student looking to commemorate your high school journey or someone interested in personalizing a jacket, this blog will provide the essential steps and tips to create a standout Letterman patch.
What are Letterman Patches
Letterman patches, those symbolic emblems often found on letterman jackets, are more than just decorative elements. They are a tangible representation of a student's hard-earned achievements in academics, sports, or extracurricular activities.
Originating from American high schools and colleges, these patches are a badge of honor, a proud display of a student's involvement and accomplishments. They typically feature the school's initials, logos, or symbols related to specific achievements, reminding them of the dedication and hard work that led to their earning.
They are a source of pride, a testament to your commitment and success, and a constant reminder of your journey and the heights you've reached.
Types of Letterman Patches:
Chenille Patches
These are the most common type of letterman patches, characterized by their soft, fuzzy texture. Chenille patches are made by stitching short lengths of yarn onto a base fabric, creating a raised, textured design.
Embroidered Patches
Unlike chenille, embroidered patches are created by stitching thread directly onto the fabric in a dense pattern, forming intricate designs and text.
Custom Patches
The beauty of custom patches lies in their versatility. They can combine chenille and embroidery or other materials, allowing various designs and colors to meet individual preferences.
Whether you want to showcase your school spirit, favorite sports team, or personal achievement, custom patches offer the perfect canvas for creativity.
They inspire you to think outside the box and create a unique representation of your journey, making creating your patches an exciting and inspiring endeavor.
The Process of Creating Letterman Patches
Creating a letterman patch involves selecting a base jacket and then customizing it with various patches representing the wearer's achievements. Here's how it's done:
Step 1: Drawing the patch's pattern
The first step involves designing and drawing the patch pattern itself, which involves the following:
Measuring dimensions
First, size the length and width of the area on the jacket where the patch has to be sewn. Employ a letter template for a sign or school name.
Your stencil's measurements should match the dimensions of the jacket's selected area. It should also match your embroidery machine's fixed and non-adjustable parameters.
Tracing outline
Outline with your stencil on design paper or a drawing pad. Adjust sizes with your ruler. One pattern will be required for the top coating and one for the lowest layer to make letters.
Make initials
Creating initials or your school's emblem is easy. Just border your lower layer with a contrasting touch. Combine it with a beautiful soft top layer of textured material like chenille. You can also include your school colors in your patch.
Cut out your designs
Now, carve out patterns. Use tailor's chalk to label your fabric. It will show your embroidery stitch. You may choose a thread color to surround the letter's upper layer and another color to border the outer layer.
Carve out the fabric's upper layer
Eliminate your fabric's upper layer. Use a cutting mat if you are cutting out with a rotary cutter. Cut out the fabric's outer layer on it. It will secure your work desk.
Do not omit the inner layer. In the next step, you should have the complete part of the cloth with the top layer outlining so you can bind the fabric to the machine's hoop accessory for embroidery.
Need More Information?
Request a quote. We will get back to you within 8-12 hours with a custom product quote.
Step 2: Stabilize the patch
This step is essential to keep the patch steady during embroidery, ensuring a clean and precise design. It would help if you kept the patch steady during embroidery. Apply a thin coat of temporary glue to the upper letter and smear it to the lower layer.
Another way is to take a foil of sticky preservatives following your fabric's weight to even out the patch while embroidering.
Step 3: Fasten your inner layer's fabric on the machine's hoop attachment
Now, bind your bottom layer's material onto the embroidery machine's hoop accessory. The fabric must be rigid. Keep the outer layer letter in the center to prevent fabric shifting during stitching.
Step 4: Embroider the letter
Embroider the upper layer with the designated embroidery darn, a specialized tool for creating intricate designs. For the best results, use a close-fitting stitch to border your letter.
As you finish embroidering the letter's border, cut any loose threads. Now, the embroiderer is the external layer. To eliminate loose threads, choose a tight darn to surround the border.
Step 5: Carve out the patch
Cut the patch with a rotary cutter. Be slow and careful, as you may cut into the embroidery yarn.
Step 6: Outline your letter
Outline your letter gently on your dual-purpose fusible. Eliminate the fusible outlining.
Step 7: Iron it
Eradicate one side of the shielding pane from your dual-purpose fusible. Follow the manufacturer's directions. Press it on the back side of your patch. You would need to iron most fusibles on a high cotton setting.
Step 8: Stick your patch to the jacket
Eliminate the second protective sheet. Place it on the jacket. Cover your patch with a Teflon sheet to protect it from the high iron setting. This is especially important if your letter's upper layer is made of a textured surface.
Apply pressure with the iron to bind the patch to the letterman jacket. Your patch will adhere to the coat in minutes.
How to Customize Letterman Jackets with Chenille Patches
Chenille patches are a popular choice for customizing letterman jackets because of their plush texture and classic appearance. Here's a step-by-step guide to creating and attaching chenille patches:
- Design the Patch: Start by creating or selecting a design. This could be your school's letter, a mascot, or any emblem representing your achievements.
- Choose the Colors: Pick colors that match your school's colors or those that have personal significance.
- Create the Patch: If you have the necessary equipment, you can make the patch at home using an embroidery machine. Otherwise, you can contact a patch-making company that specializes in chenille patches.
- Attach the Patch: Once ready, it can be sewn onto your jacket. Alternatively, use an iron-on adhesive for a secure and professional finish.
How to Create Chenille Patches
Creating chenille patches is a detailed process that involves several steps:
- Draw Your Design: Begin by sketching your patch design, ensuring it fits within the dimensions of the area where it will be placed.
- Prepare the Fabric: Select a base fabric for your patch. Common choices include felt or a durable cotton blend.
- Stitch the Design: Use an embroidery machine to stitch the chenille yarn onto the fabric. The yarn is looped and trimmed to create the raised, fluffy texture for which chenille patches are known.
- Finish the Patch: Once the stitching is complete, trim the patch's edges and add finishing touches, such as additional embroidery or a border.
Unique Ideas to Create Letterman Patches
- Glow-in-the-Dark Patches: Add a fun twist to your letterman jacket with glowing patches, making your achievements stand out even at night.
- Personalized Monograms: Customize your patch with your initials or a personal motto to make your jacket uniquely yours.
- Combination Patches: Mix materials like chenille, embroidery, and sequins for a patch with texture, depth, and sparkle.
- Vintage-Inspired Designs: Opt for retro fonts and color schemes to give your letterman jacket a classic, timeless look.
Maintenance Tips for Letterman Patches
- Avoid High Heat: When washing your letterman jacket, use cold water and avoid high heat settings in the dryer to prevent the patches from shrinking or warping.
- Spot Clean When Necessary: Instead of frequently washing the entire jacket, spot clean the patches to maintain their appearance.
- Store Properly: Store your jacket in a cool, dry place away from direct sunlight to prevent the patches from fading and deteriorating.
- Secure Loose Threads: If you notice any loose threads, trim them carefully to prevent further unraveling.
Conclusion
Letterman patches are more than just decorations; they symbolize hard work, dedication, and achievement. Whether you opt for traditional chenille or modern custom designs, creating and maintaining these patches is an art form that allows you to showcase your accomplishments proudly. These tips and ideas will enable you to customize your letterman jacket to reflect your unique journey and style.